Auth0 setup
Auth0 is an authentication provider built to be flexible, safe and reliable. It offers a generous free tier that is more than enough for any user of Hereditas.
On Auth0, users can authenticate using their existing social logins, including Google, Facebook, Microsoft accounts; the list of supported providers is fairly long. This is very convenient because it lets your users sign in with existing credentials, so you don’t need to create new accounts (and passwords) for them. It also offers increased security, as providers like Microsoft, Google, Facebook (and Auth0 itself) have a powerful infrastructure to prevent and detect malicious logins (often using AI trained on millions of authentications by their users every day), and they support Multi-Factor Authentication.
Why do we need Auth0?
Hereditas is a static website generator. In order to reduce the need for future maintenance and keeping operating costs down to zero (or almost), Hereditas outputs a static HTML5 web app with no server-side code at all. HTML5 apps nowadays are extremely powerful and we are able to do advanced cryptographic operations within a web browser.
However, in order to implement the wait timer (ensuring that users need to wait a certain amount of time after their first login to unlock your box), we needed to store data in a centralized repository. Using Auth0 and splitting the encryption key between the user passphrase given to your users, and the application token stored inside the authentication provider, lets us precisely do that, while still maintaining the promise of a fully trustless platform. For more information, check out the Security model article.
Sign up for Auth0
On the Auth0 website, sign up and create a new (free) account.
After creating an account, you should automatically be redirected to the Auth0 management portal, where you can create a new domain. Choose a name (must be universally unique) and a region, then continue the process until you’ve created your account and domain.

Create the “API Access” application
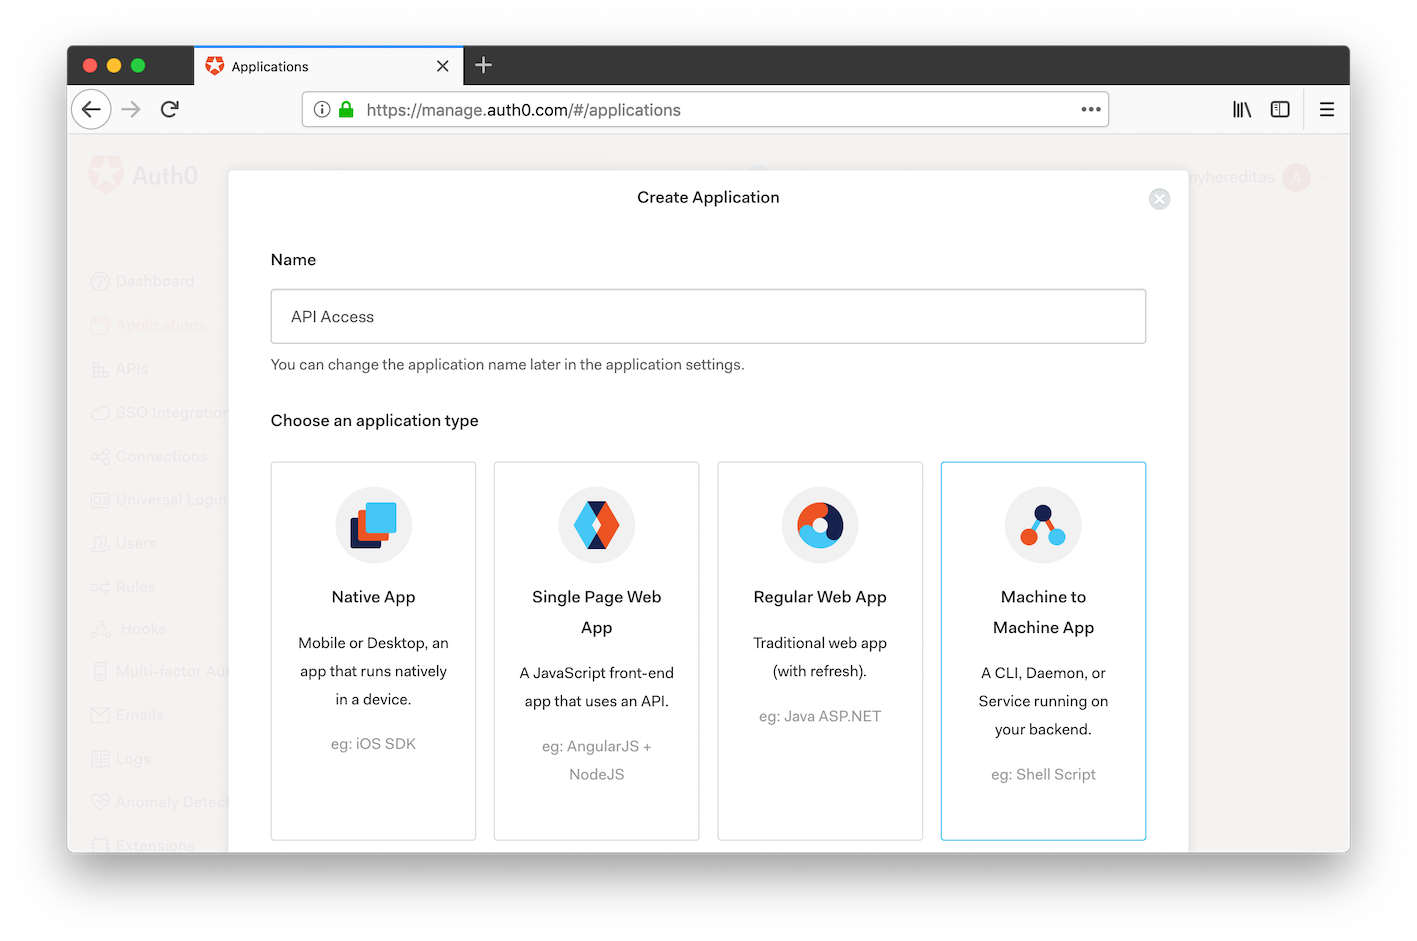
Once you are inside the Auth0 management portal, click on the button to create a new application.
Throughout this documentation, we’ll name this new application “API Access”, even though you can choose whichever name you prefer. Choose type “Machine to Machine App”, then create the app.
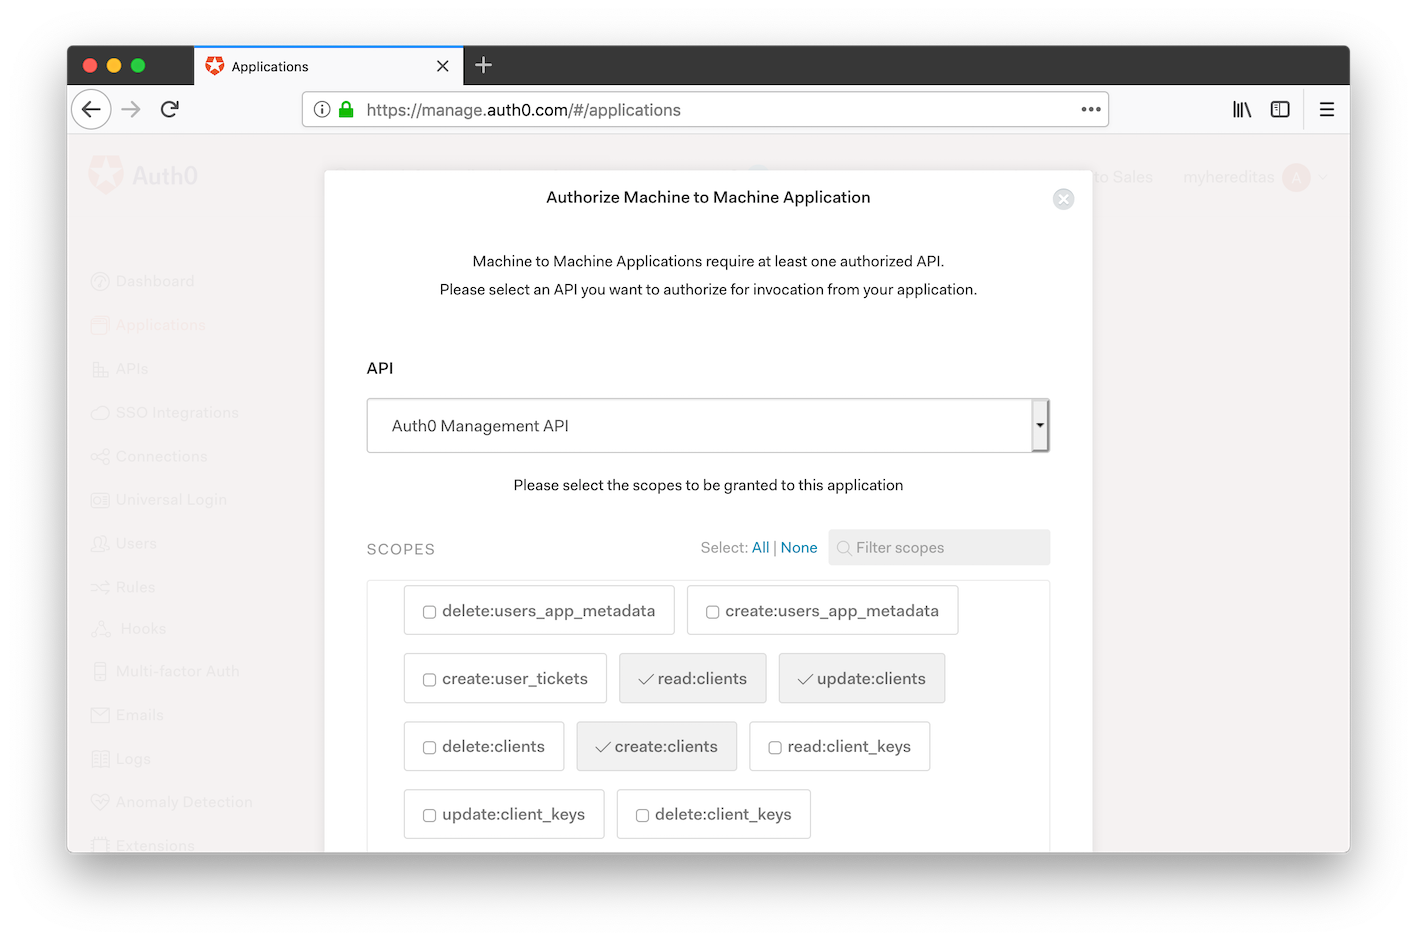
In the next step, you need to grant this application access to the Auth0 APIs. From the dropdown menu, select “Auth0 Management API”. Then, select all and only the following scopes:
- read:clients
- update:clients
- create:clients
- read:rules
- update:rules
- delete:rules
- create:rules
- update:rules_configs
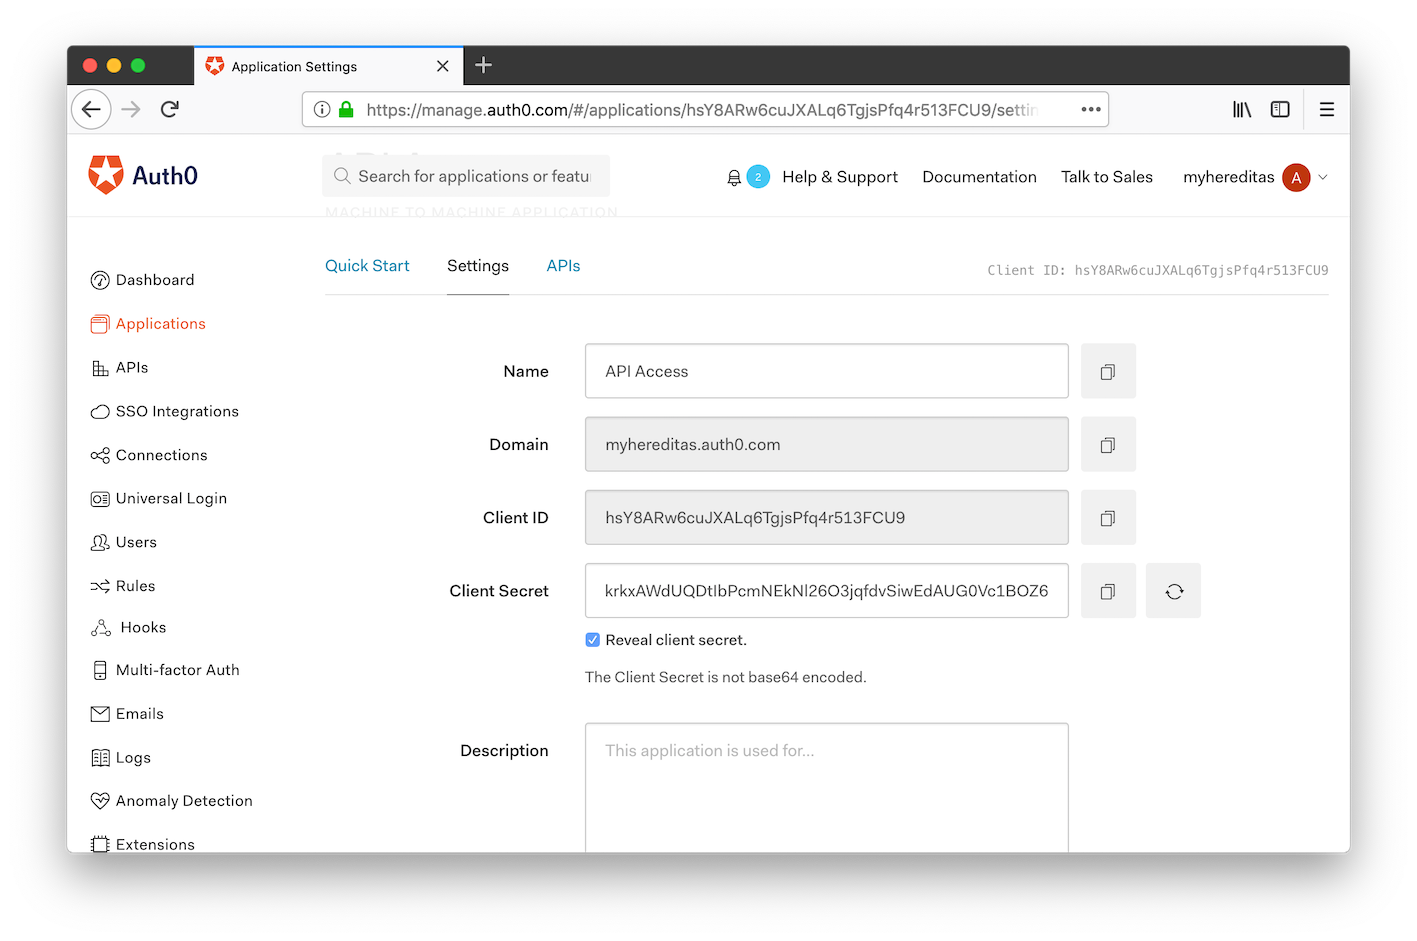
Lastly, from the Settings tab, take note of the following values, which we’ll need to pass to the Hereditas CLI:
- Domain
- Client ID
- Client Secret
Configure connections
One of the main benefits of using Auth0 is that it integrates with third-party identity providers such as Google, Microsoft, Facebook. This lets you skip creating new accounts for your users, so they can sign in with their existing credentials. Not only there’s one less password for them to remember, but it’s also safer: the external providers can support Multi-Factor Authentication, and can use advanced tools (often AI-based) to better detect hacked accounts.
Disable Username and Password authentication
By default, Auth0 offers users the possibility to create a new account specific to your app. You might want to disable that and allow social logins only. (While we recommend doing this, it’s entirely optional)
In the Auth0 Management management portal, on the menu on the left side navigate to Connections, then Database.
In the row for the “Username-Password-Authentication” database, click on “Settings”.
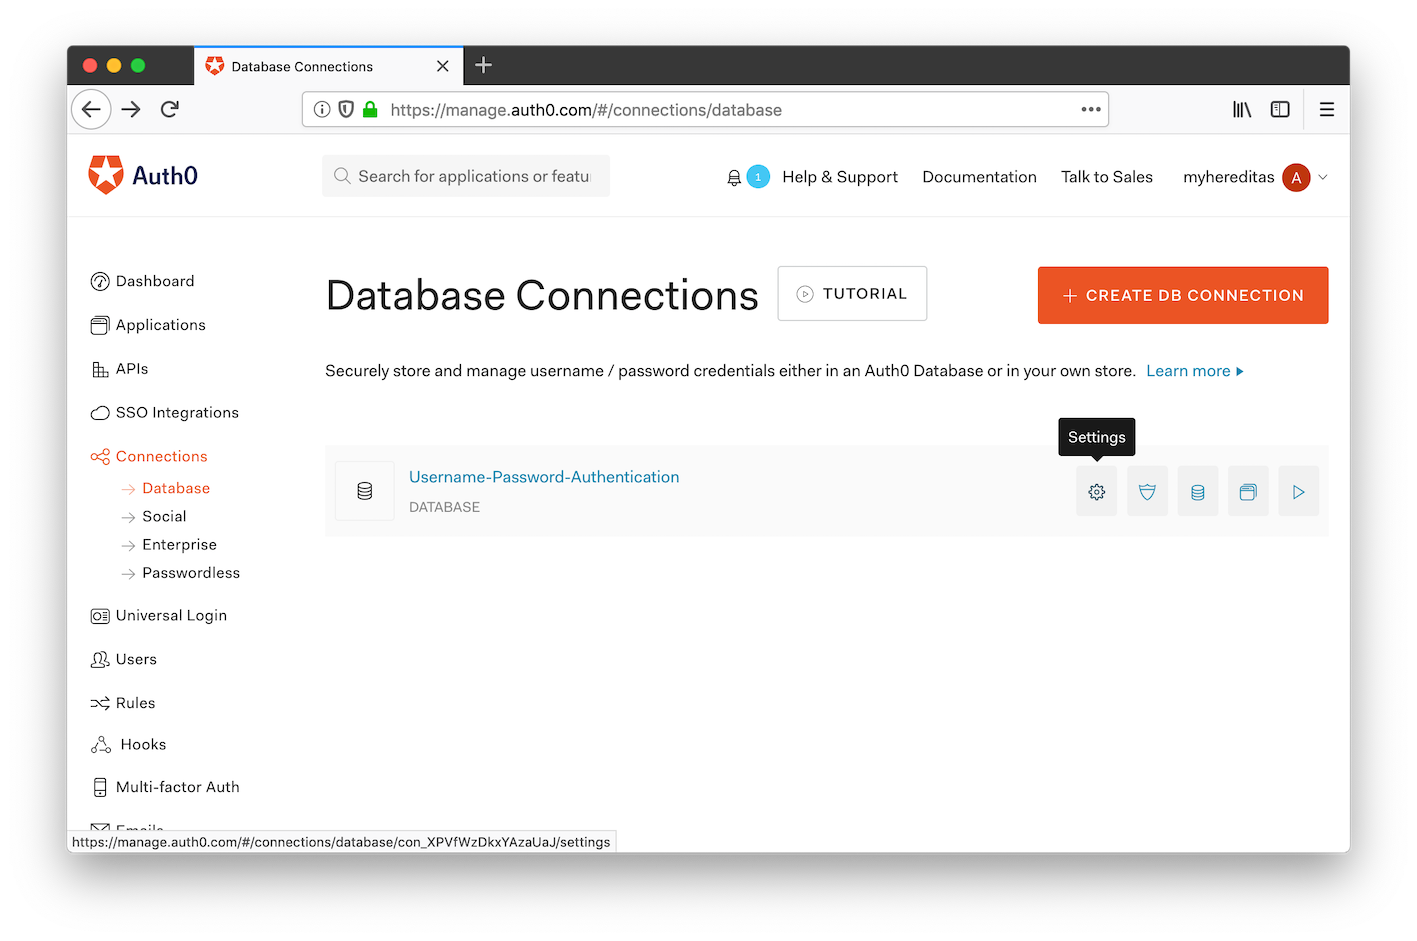
Scroll to the bottom of the page and click on the big, red button to remove the connection.

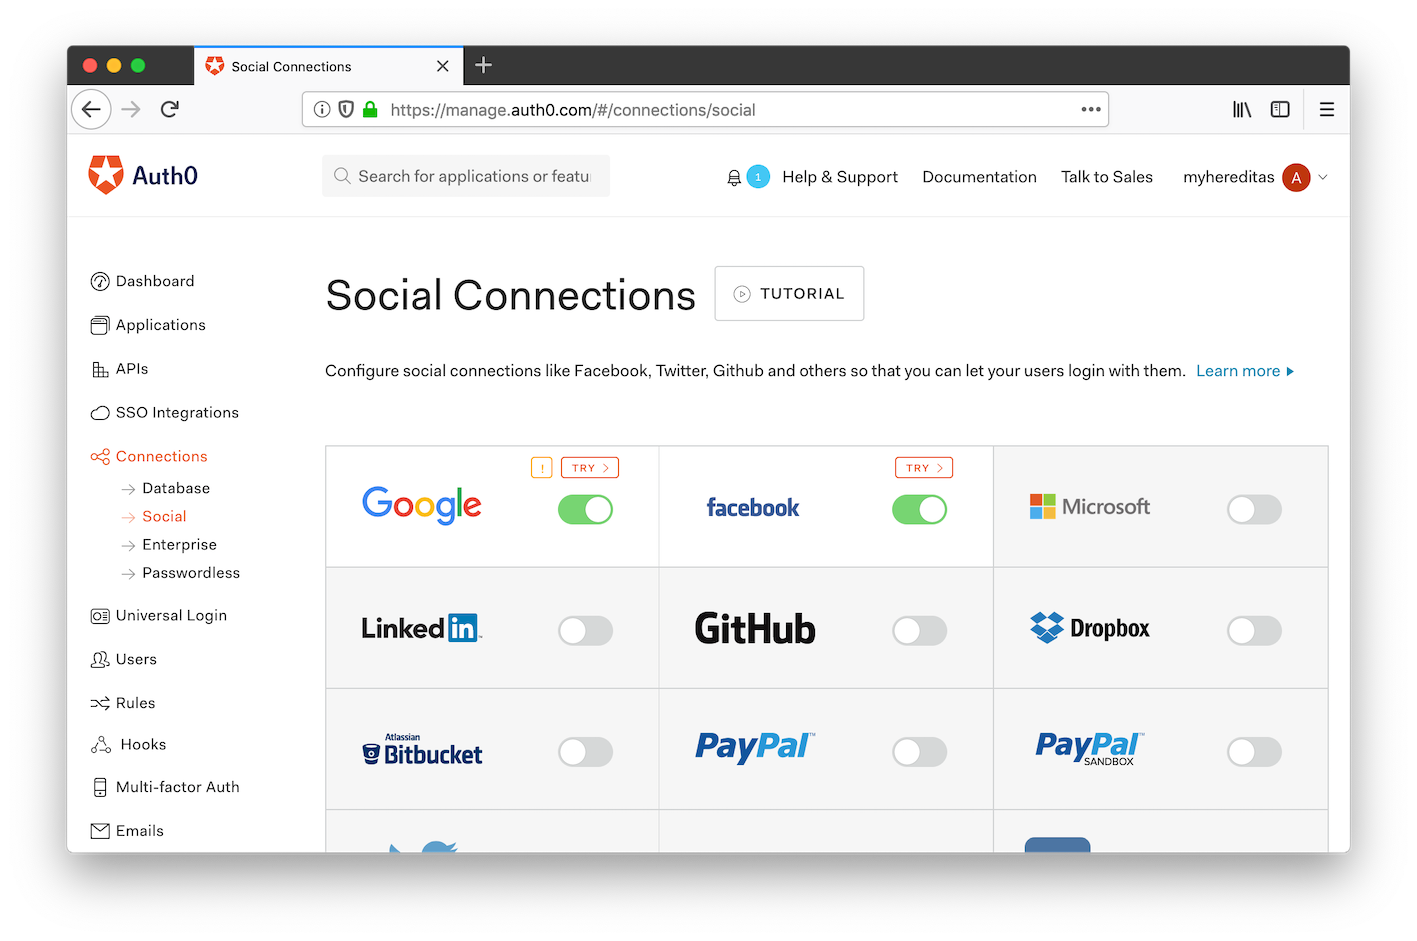
Configure social logins
In the Auth0 management portal, this time navigate to the Connections and then Social page.
Here, you can configure all the social login providers, including Google, Facebook, and Microsoft.
Each provider has a different procedure for setting the connection up, and you can follow the Auth0 documentation for instructions.
You can enable any provider you want, and your users will be able to use anyone of them. Because Hereditas whitelists users based on their email addresses, it doesn’t matter what provider they use to authenticate, as long as the email address matches.
Important: we need providers to return users’ email addresses. When you configure a new social provider, make sure that it supports sharing of users’ email addresses (not all of them do, e.g. Twitter), and that the email scope is enabled when not included in the basic info.
Next step: Login notifications
In the next step, we’ll configure a webhook to send notifications when users sign into your Hereditas box.