Deploy the box
In this last step, we’re finally ready to deploy the static web app!
In the Build the static web app article you used the Hereditas CLI to generate the box, which is a static, HTML5 web application. The generated files are in the dist folder. It’s now time to take those files and make them accessible to others.
Sync changes with Auth0
In case you haven’t done it already in the previous step, run the hereditas auth0:sync command to ensure that the Hereditas application and rules are propertly configured on Auth0 (it’s safe to run this command as often as you’d like).
hereditas auth0:sync
Testing locally
Before deploying your app, you can test it running on your laptop with a local server. There are multiple options to run a local server; a simple one is:
npx serve dist -n
This will serve all files in the dist directory at the URL http://localhost:5000, which you can open with any web browser.
Keep in mind that the URL and port must be whitelisted in the Hereditas app and Auth0. In the previous step, we did whitelist http://localhost:5000 when running hereditas init, so we’re good for now. If you use a local server listening on another port, however, you’ll have to allow that URL too – see the managing deployment URLs section below.
Choosing where to host your box
Your box is just a static HTML5 web app, with HTML, JavaScript and CSS files, plus a bunch of encrypted documents. You can deploy it on any service capable of serving HTML5 apps via HTTP(S).
Because all of your data is encrypted, Hereditas boxes are designed to be deployed on publicly-accessible endpoints too, safely.
Good solutions include Azure Blob Storage, or AWS S3. Any provider that supports static website hosting should work; this service is often free, or very inexpensive.
While possible, we do not recommend deploying Hereditas on a VPS (what would happen if your credit card got canceled and your services stopped?), nor inside a server in your home (would your relatives know how to access it from within your LAN? what if your landlord disconnected your servers, would people know how to rebuild your network?). Ultimately, however, it’s up to you, your specific situation, and to the trust you put in the technical skills of your loved ones.
Managing deployment URLs
After you’ve decided where to deploy your app to, you need to whitelist the URL where it will be reachable at. This is necessary because after a successful authentication, Auth0 will redirect users only to URLs you specifically whitelist, for security reasons.
You can manage the list of allowed URLs using the Hereditas CLI, with the commands:
For example, let’s whitelist https://myhereditas.example.com and remove the localhost one we added earlier:
hereditas url:add --url "https://myhereditas.example.com"
hereditas url:rm --url "http://localhost:5000"

# Verify the list
hereditas url:list
After making changes to the list of URLs, sync them with Auth0 so they become effective (you don’t need to re-build the Hereditas box, however):
hereditas auth0:sync
Examples
Here’s an example on how to deploy your box to Azure Storage.
Deploy to Azure Storage
Azure Storage is an object storage provider that offers static website hosting too. You pay for how much data you store, at a rate that starts at less than $0.02 per GB per month.
In order to deploy to Azure Storage, you’ll need:
- An Azure account. You can get it for free if you don’t have one already.
- The Azure CLI installed on your laptop. Installation instructions are in the official documentation.
Start by logging into Azure and creating an Azure Storage Account:
# Log into azure
# After running this, follow the instructions to log in via a web browser
az login

# Create a Resource Group and a Storage Account
# The storage account name must be universally unique
# For a list of locations available, type:
# az account list-locations --query "[].{Region:name}" --out table
AZURE_STORAGE_ACCOUNT="myhereditas"
AZURE_RESOURCE_GROUP="Hereditas"
AZURE_LOCATION="eastus2"
az group create \
    --name "$AZURE_RESOURCE_GROUP" \
    --location "$AZURE_LOCATION"
az storage account create \
    --name "$AZURE_STORAGE_ACCOUNT" \
    --resource-group "$AZURE_RESOURCE_GROUP" \
    --location "$AZURE_LOCATION" \
    --sku Standard_LRS \
    --kind StorageV2
At this point, enable static website hosting for your Storage Account, and retrieve the URL with:
az storage blob service-properties update \
    --account-name "$AZURE_STORAGE_ACCOUNT" \
    --static-website \
    --404-document "404.html" \
    --index-document "index.html"
az storage account show \
    --name "$AZURE_STORAGE_ACCOUNT" \
    --resource-group "$AZURE_RESOURCE_GROUP" \
    --query "primaryEndpoints.web" \
    --output tsv
# Result will be something similar to:
# https://myhereditas.z20.web.core.windows.net/
We can now upload all files from the dist folder into the Storage Account, in the $web container:
az storage blob upload-batch \
    --source dist \
    --destination "\$web" \
    --account-name "$AZURE_STORAGE_ACCOUNT"
In the last step, we need to whitelist the website’s URL with Auth0:
# Replace the URL with yours
hereditas url:add --url "https://myhereditas.z20.web.core.windows.net"
hereditas auth0:sync
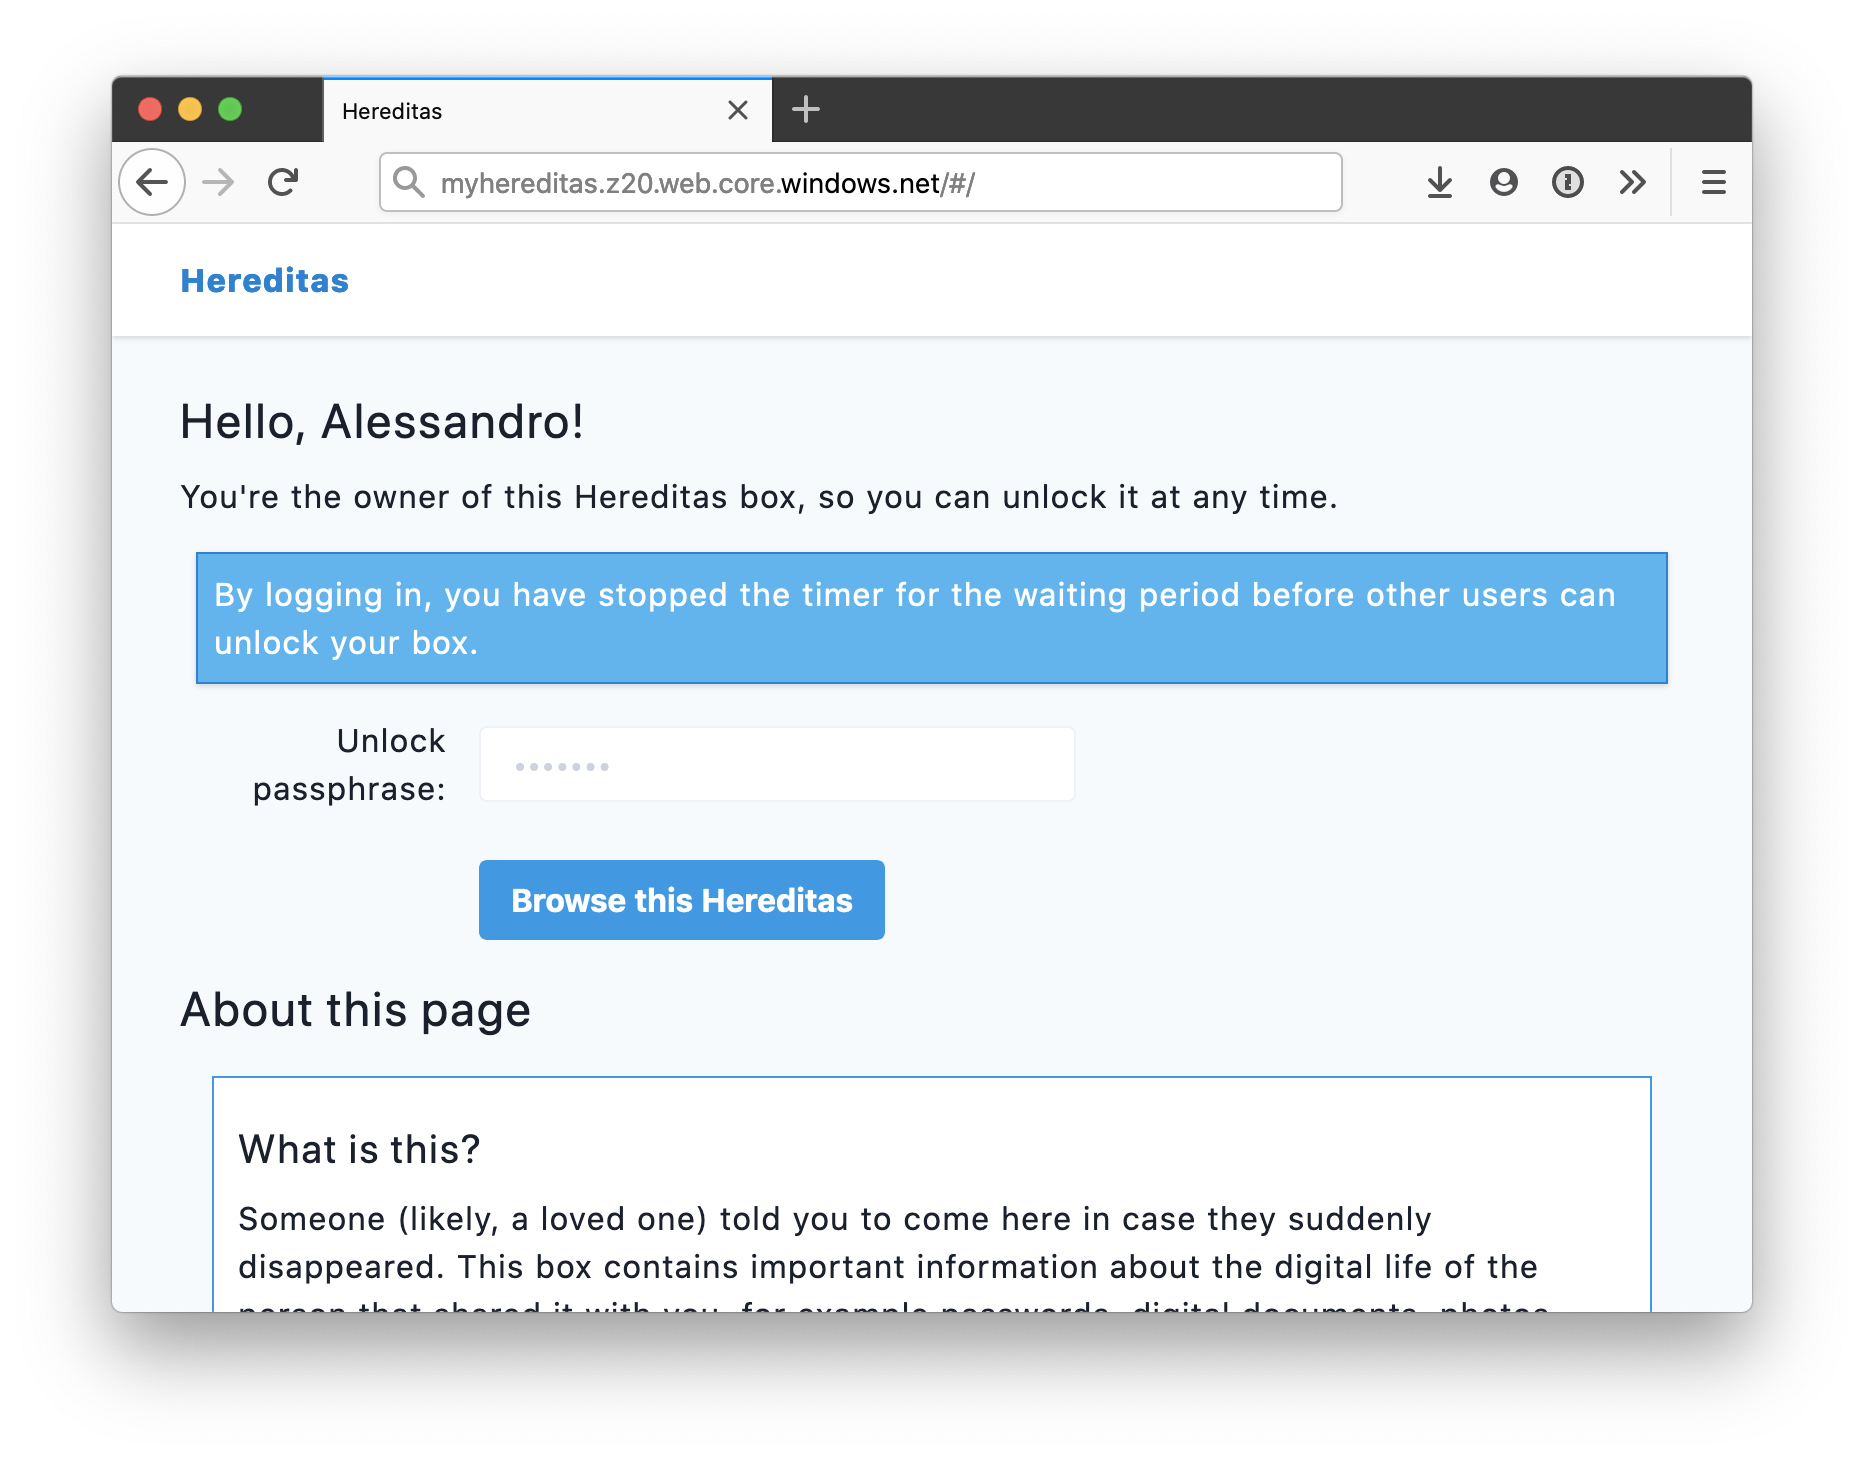
Done! You can now go to https://myhereditas.z20.web.core.windows.net and use your Hereditas box.
Share the information with your relatives
At this point, you have all the information you need to give to your relatives, for usage in case you disappear. Send them a letter, or an email, or anything else that works for you.
Make sure to include:
- An explanation of what this Hereditas box is, and what information they can find in there.
- The URL they need to type
- The user passphrase
- The name of the account they need to use to sign in (the email address)
This is all and only the information they need to use Hereditas.